Just as with your iOS app, managing subscriptions for your Android app requires you to configure "products" within your own Google Play Console. This ensures that all transactions are processed securely through your developer account and revenue is deposited directly into your linked bank account.
This guide will walk you through the essential steps to create subscription products that integrate seamlessly with your Audiorista CMS.
Table of Contents
Step 1: Merchant account & app setup
Before you can create subscriptions, your Google Play Developer account must be linked to a Google Merchant Profile.
Merchant Profile: Go to Settings > Payment profile in your Google Play Console to ensure your banking and tax information are verified.
Active App: You must have an app created and at least one internal or closed test track build uploaded before Google allows the creation of in-app products.
Step 2: Creating a subscription product
Google organizes subscriptions by "Products" which contain one or more "Base Plans."
Open the Google Play Console and select your app.
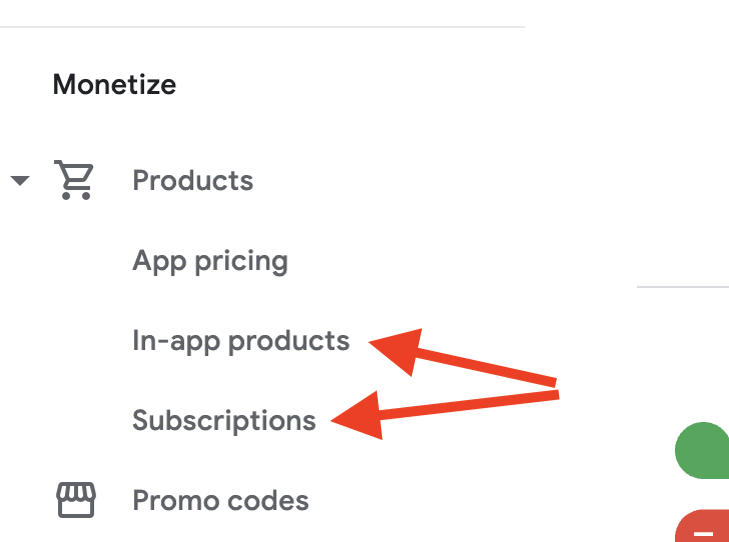
In the sidebar, scroll down to the Monetize section and click Products > Subscriptions.
Click Create subscription.
-
Product ID: Enter a unique alphanumeric identifier.
Pro Tip: Use a clear format like
brand_duration(e.g.,myapp_monthly_v1). Note: A Product ID cannot be reused even if the product is deleted. Name: Enter a short name for the subscription (e.g., "Premium Access"). This name is visible to users on the Play Store.

Step 3: Creating a base plan
In the current Google Play ecosystem, customers don't technically purchase a "Subscription Product"—they purchase a Base Plan within that product. Each subscription must have at least one base plan to be visible in your Audiorista app.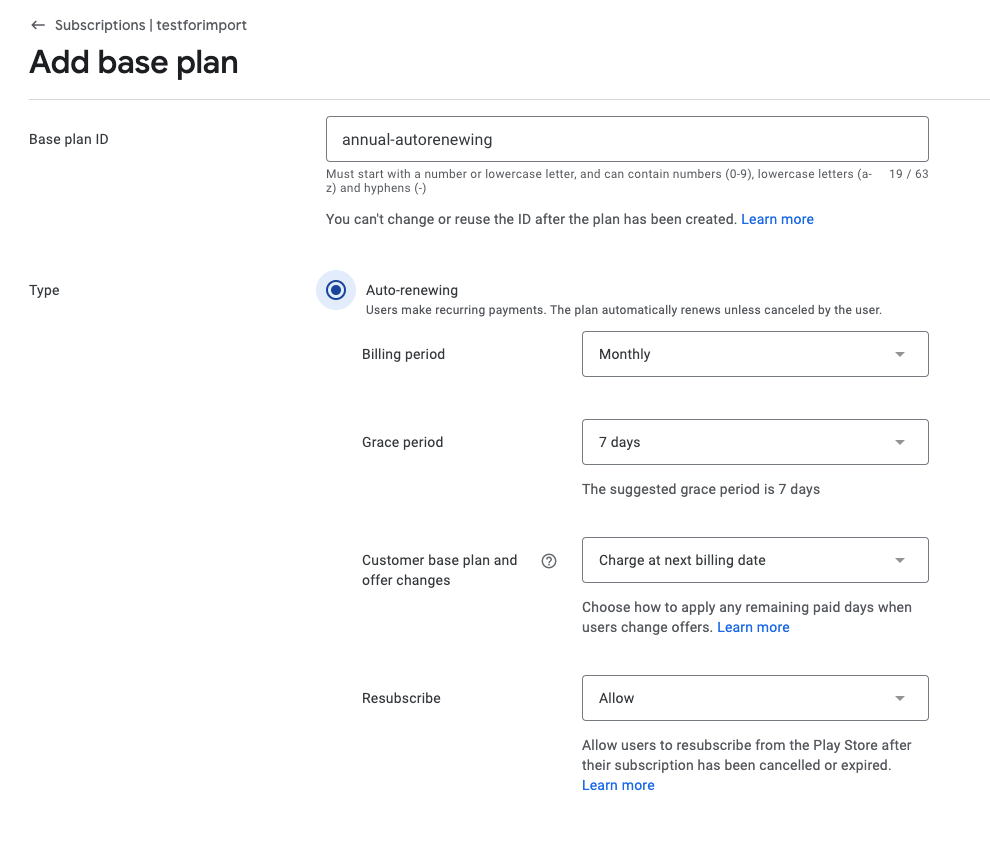
Click Add base plan and fill in the required fields.
Naming Convention: To keep your dashboard organized, we recommend a clear ID format like
duration-renewaltype(e.g.,annual-autorenewingormonthly-auto).Set Price & Activate: Define your price point and click Activate.
📘 A Note on Migrated Products If you created subscriptions before May 2022, Google automatically migrated them into this new "Base Plan" format. You’ll likely see an identifier like
P1Y(Annual) orP1M(Monthly) already in place.
Step 4: Backwards compatibility (Critical)
Because your Audiorista app uses a specific integration to talk to Google, it needs to know which "Base Plan" is the primary one. If you have multiple plans, you must mark one as backwards compatible.
Find your primary Base Plan and click the three-dot overflow menu.
-
Select "Use for deprecated billing methods."
❗️ Important: Only one base plan per subscription can be marked this way. This is the plan that will be served to your users by default.
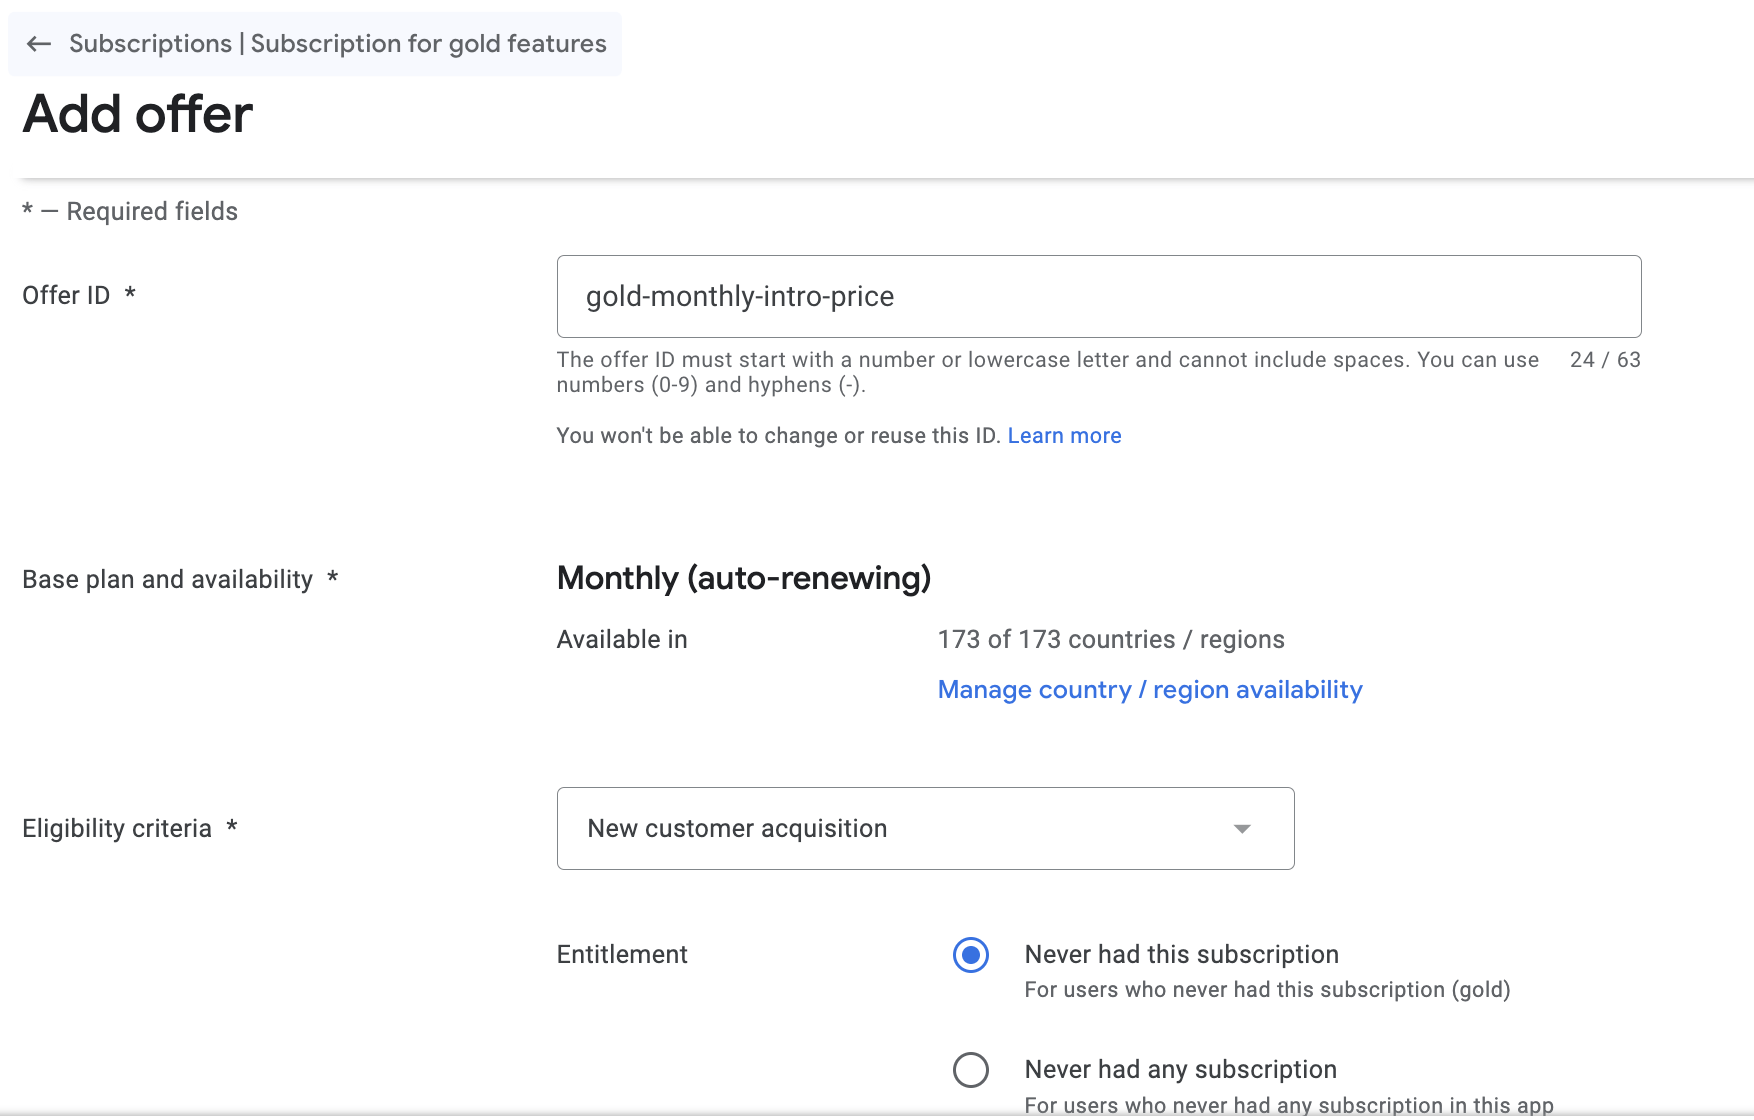
Step 5: (Optional) Adding an offer
If you want to offer a free trial or a discounted introductory price, you can do this by clicking Add offer on the subscription page.
Select IDs: Choose a unique Offer ID and define the eligibility (e.g., "New Customer Acquisition").
Phases: Set your trial duration (e.g., 7 days).
Backwards Compatibility: Just like the Base Plan, if you want your trial to show up correctly in the app, click the overflow menu for the offer and select "Use for deprecated billing methods."
Step 6: Adding non-consumable products (Lifetime Access)
If you want to offer a "Lifetime" or "One-time" purchase instead of a recurring subscription, these are handled as In-App Products.
Non-Consumable: When setting this up in your monetization dashboard, ensure it is marked as "Non-Consumable." This ensures the customer owns it forever and isn't asked to buy it again.
Safety Tip: If you don't toggle this correctly, Google may allow the customer to "consume" the purchase (like buying a coin in a game), allowing them to be charged twice for the same content.

Step 7: Final sync & editing
The beauty of this setup is that it is flexible. You can edit pricing, names, or trial lengths in the Google Play Console at any time.
Propagation: Changes usually take a few hours to appear in your app.
"Make Editable": You may see a notice in Google Play regarding the InAppProduct API. If you are using our standard integration, it is perfectly safe to select "Make editable" to ensure you can update your products in the future.

Ready to go live?
Once your products are active in Google Play, the final step is to head back to the Audiorista CMS to map these IDs to your content categories.